1. First, install wine:
brew cask install java xquartz
brew install wine
2. Now, install winetricks:
brew install winetricks
3. Now, install Microsoft Data Access Components
winetricks dlls mdac28
4. Download Heidisql.
http://www.heidisql.com/download.php
5. Install Heidisql with wine command:
wine HeidiSQL_10.1.0.5464_Setup.exe
6. Start the application from from:
"/usr/local/bin/wine ~/.wine/drive_c/Program\\ Files/HeidiSQL/heidisql.exe"
or create an icon for your docker with the apple script editor
tell application "Terminal"
do script "/usr/local/bin/wine ~/.wine/drive_c/Program\\ Files/HeidiSQL/heidisql.exe"
end tell
Open up the Script Editor. You should see a window with a large area you can type in near the top: this is where you write your AppleScript. In that area, type the following text:
tell application "Terminal"
do script "/usr/local/bin/wine ~/.wine/drive_c/Program\\ Files/$PATH_TO_PROGRAM.exe"
end tell
You'll need to replace $PATH_TO_PROGRAM with the path from the Program Files directory to your program executable. You can see that you're simply telling the AppleScript to run a line of code in the Terminal: the same line of code that you could run to start your Windows program.
Next, press the Compile button at the top of the window. The text should become colored to indicate that Script Editor understands what you wrote. You can also try pressing the Run button to run your script: it should open the Windows program successfully.
Lastly, save your script. You can give it whatever name you'd like, but be sure to select File Format: Application in the save options, and leave Startup Screen unchecked.
Open up the Finder, go to where you saved your script, and drag that file to your Dock. It should stay there, just like a real application -- because it is a real application! However, all it does is run that launcher command for you, so you can move the application around, rename it, or even delete it, and it won't affect the Windows program that you're running.
More details: https://www.davidbaumgold.com/tutorials/wine-mac/
Taken from: https://myridia.com/dev_posts/view/1620
Showing posts with label OSX. Show all posts
Showing posts with label OSX. Show all posts
Friday, February 22, 2019


Monday, June 12, 2017
caffeinate command: Disable Sleep on a Mac from the Command Line
What is the ‘caffeinate’ Command in Mac OS X
The 'caffeinate' command just prevents sleep entirely, but you can modify the command with various flags to prevent just the display from sleeping, provide a specified time to avoid sleeping, prevent sleeping while a command runs, and more. The command details is given below:
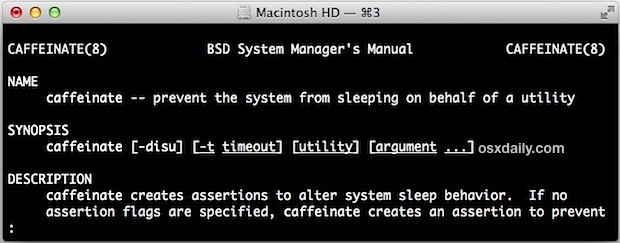 |
| caffeinate command help |
A few useful examples are discussed below.
How to Disable Sleep with the ‘caffeinate’ Command in Mac OS X
To temporarily disable sleep functions regardless of sleep settings, run the following command from Terminal in Mac OS X:
caffeinate
At the core basic function of the command, caffeinate is all that’s necessary, and while caffeinate is active sleep will be prevented until it’s no longer running.
To stop caffeinate and return to normal sleep behavior, you can hit “Control+C” to quit out of caffeinate as it’s running like this, or you can kill it with the ‘killall caffeinate’ command if desired.
You can also run caffeinate for a pre-determined amount of time to prevent sleeping for a specified block of time, say for 4 hours while you download something, and then run it in the background by adding & to it:
caffeinate -t 144000 &
The number attached to the -t flag is the amount of time in seconds for sleep to be disabled on the Mac.
Caffeinate can also be attached to other commands to prevent the Mac from sleeping while that given command runs:
caffeinate [command_to_run] -arguments
That causes the Mac to avoid sleep only as long as it takes to run the command provided, after which the normal sleep rules apply.
With these latter tricks, if you run caffeinate in the background and want to cancel it then the easiest way to quit the process is to issue the kill command for the reference process ID, or simply ‘killall caffeinate’
To use the caffeinate command you’ll need to be running a fairly modern version of OS X, as the feature was introduced in 10.8 Mountain Lion and persists through 10.9 Mavericks, and into 10.10 Yosemite.
source: http://osxdaily.com/2012/08/03/disable-sleep-mac-caffeinate-command/
source: http://osxdaily.com/2012/08/03/disable-sleep-mac-caffeinate-command/
Subscribe to:
Posts (Atom)